
Saving Money: Making Candi Sugar

Beet sugar waiting to invert.
I love Belgian Candi Sugar. So much so, that since I started this blog, it's shown up in my Belgian Strong Pale Ale, Tripel-Dubbel, Enkel and Tripel recipes. Unfortunately, the stuff is rather expensive. Upwards of $5.00 a pound expensive. This led me to wonder if I could make it myself.

How hard can it be?

Checking the temp at 15 min.
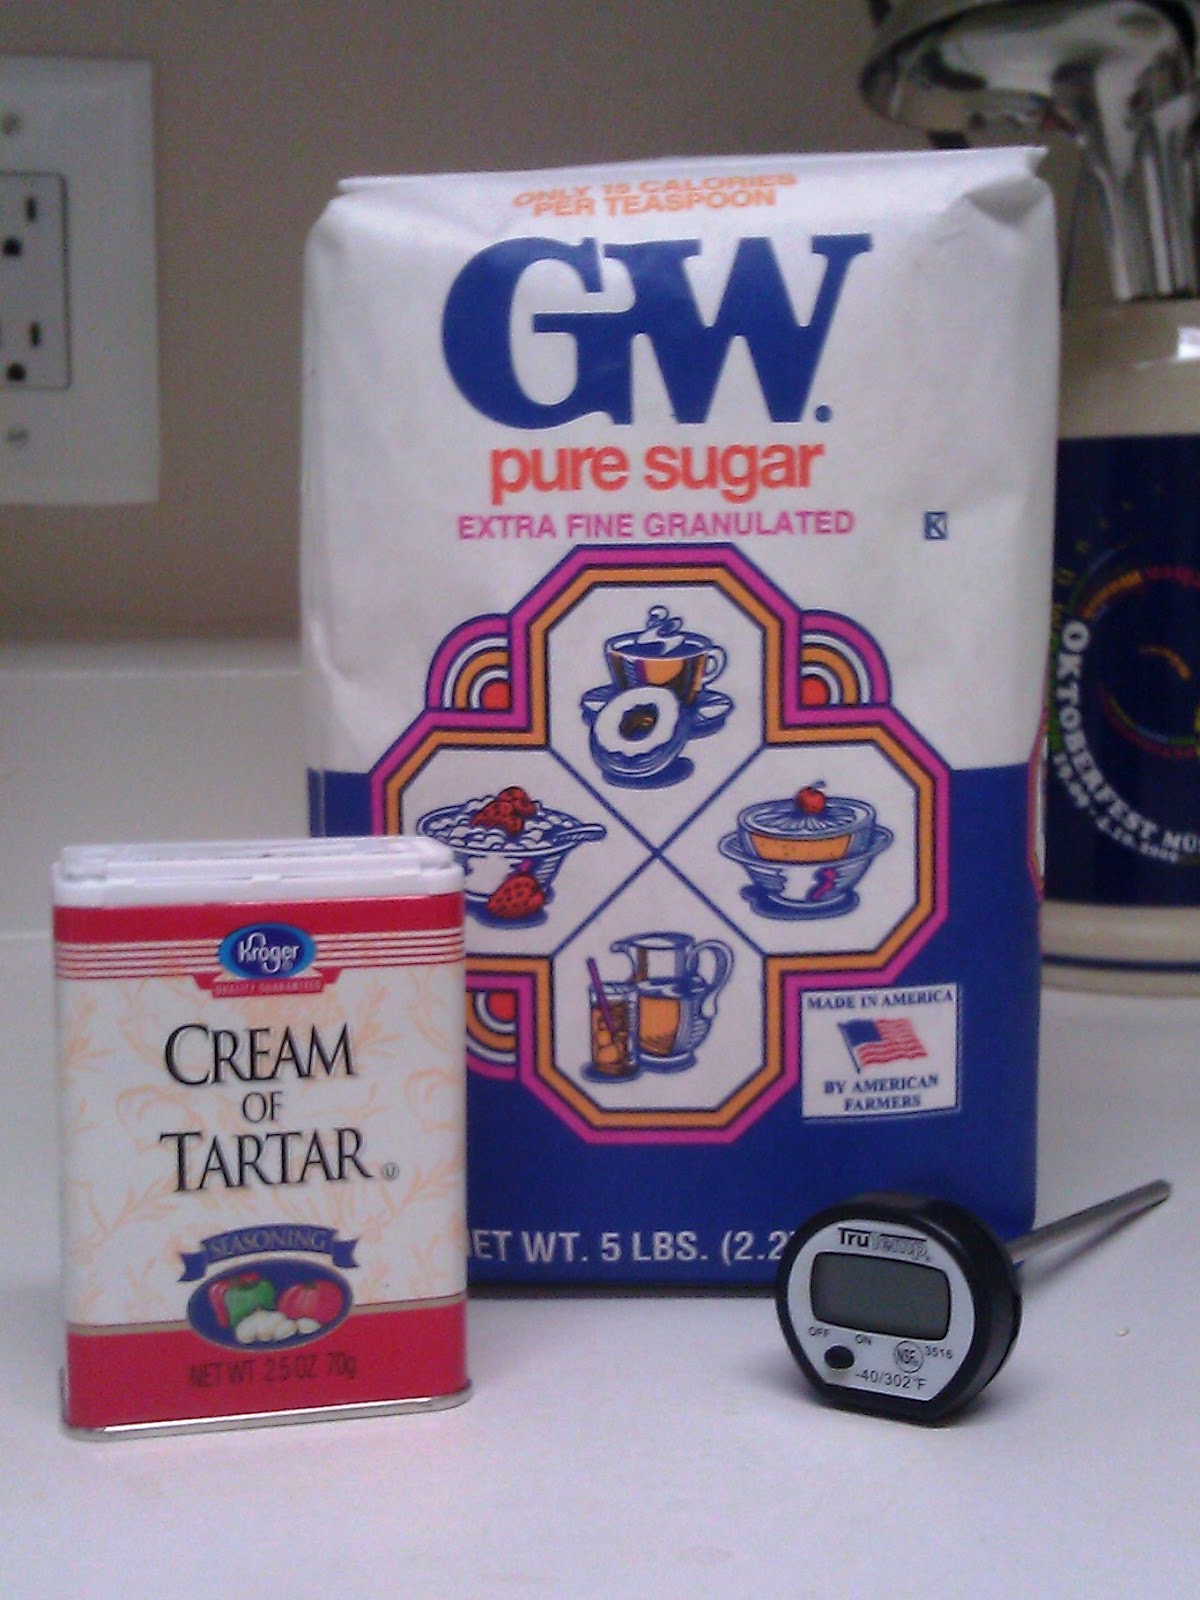
After a bit of research, it turns out to be a pretty simple and inexpensive process. In addition to a pot and spoon, all it takes is sugar, water, cream of tartar, a candy thermometer, a cookie sheet, aluminum foil or parchment paper, plus a little time. More importantly, the finished product will cost less than a $1.00 a pound.

The syrup is darkening at 30 min.
If you want to be true to the Belgian original, you'll want to use beet sugar. Here in Colorado, we have a local producer of it, but it can be hard to find in some other markets. No worries though, as cane sugar works just as well.

Here it is after 60 min.
Rather than bore you with details about chemical reactions, I'll keep things simple. What you're basically doing is mixing sugar with water to make a syrup, then heating the syrup at a set temperature long enough to achieve the desired color and aroma. The cream of tartar is there to break the sugar down into glucose and fructose, which makes your yeast's job of converting the sugar to alcohol easier.

Here's the basic procedure for making one pound of Candi Sugar:
  1. Mix one pound of sugar with approximately 1 cup of water to make a thick syrup.
  2. Over Medium heat, gently stir the liquid until the sugar is dissolved and then add 1/4 tsp Cream of Tartar
  3. Maintain Medium heat and slowly bring the mixture to a boil. 
  4. Hold your temperature between 260-275F, without going over. The water will evaporate as you go, so add small amounts of cold water as needed to maintain your temp. I end up adding 1-2 Tbsp every couple of minutes.
  5. Keep cooking the sugar until the desired color and aroma is achieved. Clear Candi Sugar (it will actually be a touch yellow) will be ready in as few as 15 minutes and have little to no aroma. As the sugar darkens, caramel and dark fruit aromas will develop with increasing intensity.
  6. When you've reached the color and aroma you want, increase the heat until the sugar reaches 300F and then remove the pot from the stove.
  7. Pour the sugar onto a foil or parchment paper covered cookie-sheet in a thin layer and allow to cool.
The finished sugar ready to pour and cool.
The cooled sugar will be rock hard and ready to store for later use.

One word of caution. Whatever you do, don't let the sugar cool in the pot. If you do, you will have a major-league mess on your hands. Once you've poured the sugar out, rinse the pot immediately.

That's it. Candi Sugar made nice and cheap. The first beer I've used it in will be up in a future blog.

Comments

Popular posts from this blog

In the Fermentor: Bohemian Kölsch

Being a brewer on a budget, I don't have an extra fridge to lager in. That poses a bit of a problem, because I love a good Pilsener on a hot Summer day. To my palate, the closest style to Pilsener in the ale department is a German Kölsch . To that end, I've wedded a Bohemian Pilsener influenced recipe with a Kölsch yeast strain to create my Bohemian Kölsch pseudo-lager. I realize that the finished product won't be as clean, crisp and clear as a traditional Pils, but I'm hoping to come close. I want a full five gallons of this beer. Since my kitchen setup isn't conducive to five gallon all-grain batches, I've taken the partial-mash approach. I've also thrown in a bit of Irish Moss toward the end of the boil to help with clarity. Here's the five-gallon recipe: Grains: 3.5 lbs German Pilsener 8 oz Munich 8 oz Crystal 10L 4 oz CaraPils Hops: 1 oz Saaz: First Wort Hopping 0.5 oz Merkur: 60 min 1 oz Saaz: 7 min Extras: 3 lbs Pilsen ...

Out of the Bottle: Insert clever use of the word Wit here

My latest Wit was a hit at my friend's birthday party. He especially liked the beer's citrus components. Others found it to be light and refreshing. I heard no Blue Moon comparisons, which actually made me quite happy. Compared to My Wit's End , this beer is much closer to style. Unmalted Wheat is part of the reason, as there's much less grainy sweetness at work. Instead, the beer is crisp and dry. The bitter orange peel really does its thing. The peel's sharp flavor melds nicely with the sweet orange peel I also used. Coriander pushes the beer's spicy character along. If I were to change anything, it would be to dial it back a notch or two. Some light sourdough aromas round out the flavor and aroma. Despite the relatively low ABV of right around 5.0%, the beer sports a fairly hefty body. Overall, I'm quite happy with this Wit. Next time, I'll hold back on the coriander. Maybe I will even take a shot at a Turbid Mash, which sounds like a great sub...

Out of the Bottle: Porter vs Porter

My Beer My attempt to clone Samuel Smith Taddy Porter is ready to pour. For a change of pace, I've picked up a 4-pack of the real deal to compare and contrast against my efforts. Since I'm not exactly an impartial judge, my girlfriend agreed to blind taste test the two beers side by side in identical, unmarked glasses. I've mixed her notes in with mine. First off, I must say that the beers look remarkably similar. Taddy pours with a slightly larger head, but the beers share the same deep garnet hue. Mine has a bit more carbonation going on. Both beers have good head retention and leave some lace behind. My girlfriend's first comment was that my beer was very similar, but finished quicker than the Samuel Smith. She also noted that the Samuel Smith is slightly more bitter, with more depth of flavor. The first thing I noticed was that my beer has a more roasted edge and is a bit nuttier. It also lacks the unique dark fruit esters that I sense in all of the Samuel...